
2025-09-09 @
Angular signal forms - Advanced features
Changelog:
2025-12-08: This article has been upgraded to the released version of Angular 21.
2026-02-07: This article has been upgraded to Angular version 21.2.0-next.2, in which the Field directive has been renamed to FormField.
This time around, we’ll take a look at more advanced features of the newly released, experimental signal forms. If you are not up to speed, make sure to take a look at the previous issues:
The repo is the same and it can be found here, but as of the release of this article, the live demo is also up on this site, here.
Custom form control
I can’t believe I can finally say this, but we might be done with ControlValueAccessor. What used to be a rather cumbersome API is now replaced with a simple model named value inside any component we want to use as a custom control. It really is that simple.
First of all, let’s create our custom control:
import { Component, model } from "@angular/core";
@Component({
selector: 'app-custom-control',
template: `
<div [style.backgroundColor]="value()" (click)="changeColor()">Click Me!</div>
`,
styles: `
:host {
display: flex;
justify-content: center;
}
div {
width: 100px;
height: 100px;
display: flex;
justify-content: center;
align-items: center;
}
`
})
export class CustomControl {
value = model('');
colors = ['red', 'green', 'blue', 'yellow'];
changeColor() {
const randomIndex = Math.floor(Math.random() * this.colors.length);
this.value.set(this.colors[randomIndex]);
}
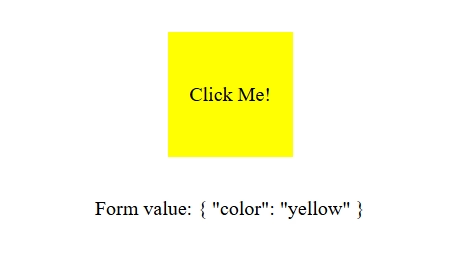
}Yes, this is the entire code of our control and most of it is fluff. All we really need to make this a custom form control is this single line:
value = model('');The rest is just some styling and logic to visualize things, but basically, every time we click on our div, its background color changes randomly and value will be set to the random color.
Using this is also really simple:
@Component({
  template: `
    <form>
      <app-custom-control [formField]="f.color"></app-custom-control>
    </form>

    <span>Form value: {{ f().value() | json }}</span>
  `,
})
export default class CustomControlForm {
  f = form(signal({
    color: '',
  }));
}
I left out some things like styling and imports to make it more readable, but this is more or less everything there is to this. This is a huge win for Angular’s DX!
Multiple schemas
You wonder how you can deal with complex forms in smaller chunks to make it more maintainable? Luckily, that’s incredibly easy too!
First things first, let’s define our types and schemas:
type NameSchema = {
  firstName: string;
  lastName: string;
};

type AddressSchema = {
  street: string;
  city: string;
};

type Person = {
  name: NameSchema;
  address: AddressSchema;
}

const nameSchema = schema<NameSchema>((p) => {
  required(p.firstName, { message: 'First name is required' });
  required(p.lastName, { message: 'Last name is required' });
});

const addressSchema = schema<AddressSchema>((p) => {
  required(p.street, { message: 'Street is required' });
  required(p.city, { message: 'City is required' });
});
We’ve created a Person type that also has complex types inside. NameSchema and AddressSchema will be used to create the schemas based on those.
Our form definition is still really simple:
model = signal<Person>({
  name: {
    firstName: '',
    lastName: ''
  },
  address: {
    street: '',
    city: ''
  }
});
f = form(this.model, p => {
  apply(p.name, nameSchema);
  apply(p.address, addressSchema);
});
Now, instead of directly passing a schema to the form function like we did in the example with the basic schema definition, we use FieldPath and the apply function to, well, apply the schemas to their respective “groups” in our form.
The only thing we need to change in our template is that from now on, we can access firstName like f.name.firstName instead of f.firstName. For example:
<mat-form-field>angular-signal-forms-advanced
  <mat-label>First Name</mat-label>
  <input matInput [formField]="f.name.firstName" />
  @if (f.name.firstName().invalid()) {
    <mat-error>{{ f.name.firstName().errors()[0].message }}</mat-error>
  }
</mat-form-field>
Conditional schema
Taking the multiple schemas example a bit further, we’ll apply schemas conditionally too!
We alter our Person type and add canReceiveNewspaper:
type Person = {
  name: NameSchema;
  address: AddressSchema;
  canReceiveNewspaper: boolean;
}
Our schema definitions remain the same and the only change we have to make to our template is adding a checkbox to our form:
<mat-checkbox [formField]="f.canReceiveNewspaper">Send me newspapers!</mat-checkbox>The form definition largely remains the same, but this is where it gets interesting:
model = signal<Person>({
  name: {
    firstName: '',
    lastName: ''
  },
  address: {
    street: '',
    city: ''
  },
  canReceiveNewspaper: false
});
f = form(this.model, p => {
  apply(p.name, nameSchema);
  applyWhen(p.address, ({ valueOf }) => valueOf(p.canReceiveNewspaper), addressSchema);
});
Notice, that we’ve added canReceiveNewspaper to our model signal. Other than that, the only change is that we use applyWhen for the address schema, which accepts a function as its second parameter, that returns true when the schema should be applied. In our example the logic is very simple, we make the address controls required if the person opts in to receive newspapers, but you can go wild to your heart’s contents with this!
Replacing FormArray
Our last example brings us to handling what used to be a FormArray, which has been a major pain point when it came to DX. For this example, we also have to change the definition of our Person type:
type Person = {
  name: NameSchema;
  addresses: AddressSchema[];
}
As you can see, we removed the boolean and changed address: AddressSchema to an array of multiple AddressSchema instances.
We add an “Add Address” button to our template and from now on, we iterate through f.addresses to render our address controls:
@for (address of f.addresses; track $index) {
  <mat-form-field>
    <mat-label>Street</mat-label>
    <input matInput [formField]="address.street" />
    @if (address.street().invalid()) {
      <mat-error>{{ address.street().errors()[0].message }}</mat-error>
    }
  </mat-form-field>

  <mat-form-field>
    <mat-label>City</mat-label>
    <input matInput [formField]="address.city" />
    @if (address.city().invalid()) {
      <mat-error>{{ address.city().errors()[0].message }}</mat-error>
    }
  </mat-form-field>
}

<button mat-button type="button" (click)="addAddress()">Add Address</button>
As for the actual logic:
export default class FormWithArray {
  model = signal<Person>({
    name: {
      firstName: '',
      lastName: ''
    },
    addresses: [{
      street: '',
      city: ''
    }],
  });
  f = form(this.model, p => {
    apply(p.name, nameSchema);
    applyEach(p.addresses, addressSchema);
  });

  addAddress() {
    this.model.update(m => ({
      ...m,
      addresses: [...m.addresses, { street: '', city: '' }]
    }));
  }
}
We apply the changes of the Person type to our model signal, turning address into addresses. The addAddress() method is pretty straightforward, it adds a new AddressSchema to our addresses array. The key thing you should pay attention to here is that we used applyEach this time, which applies our schema definition to every element that gets added to addresses.
Conclusion
All of these features are major pain points when working with Reactive Forms in Angular. The fact that these can be demonstrated through these very simple examples tells us all we have to know about how big of a win this is for Angular’s DX.
Obviously, like everything else regarding signal forms, all of these are still experimental features, so make sure to consider that before you start using these in production grade applications, but this is clearly the - I hope very near - future of Angular.
Newsletter
Sign up for my maybe monthly (not likely) newsletter for updates on new posts and other content.