
2025-10-01 @
AMQP 1.0 Messaging in .NET with Apache Artemis - Part 2
Changelog:
2025-10-03: Added link to part 3.
In part 1 of this series, we’ve created a dockerized Artemis instance and our starting .NET application. This time, we’ll take a look at creating an address on the Artemis console and sending a message to it.
The source code for this article can be found here.
Creating the address
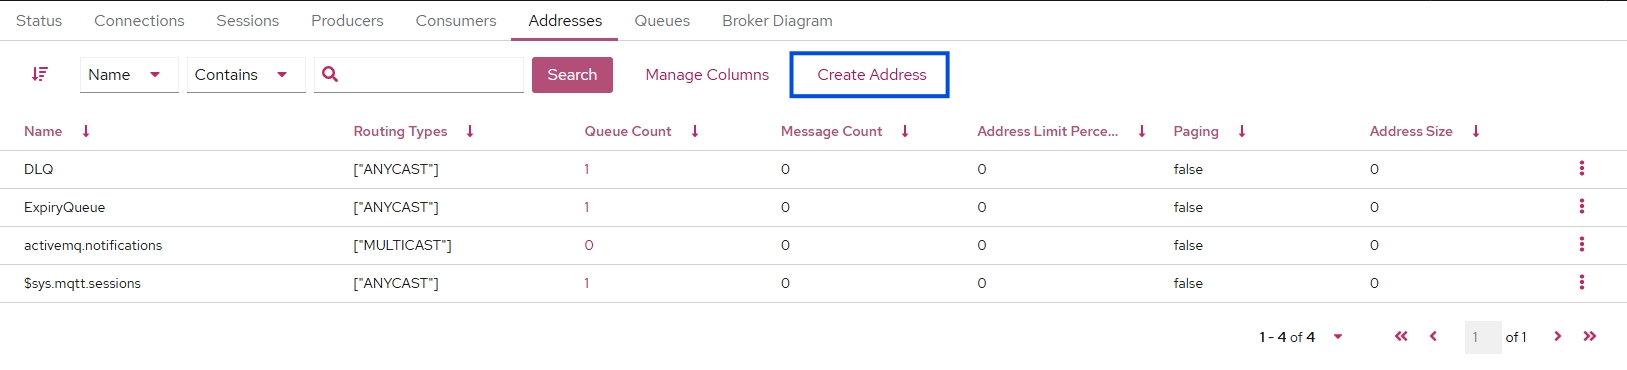
First, make sure that your Artemis container is up and running, then navigate to http://localhost:8161 to access the Artemis console. After logging in with the credentials we’ve set up in our docker-compose.yml file, you should find yourself on the dashboard’s Status tab. Right now, we are interested in the Addresses tab, so let’s navigate there.

Once you’re there, you’ll see the list of the default addresses, but also, you’ll see the Create Address button.
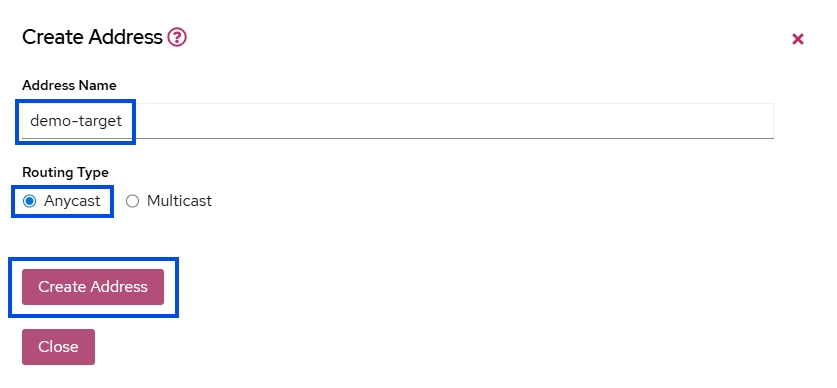
If you click on it, the Create Address modal will pop up. For this demo, we’ll add the demo-target name to our address and set it to Anycast, then click the Create Address button.
Sadly, the Artemis console is not refreshing automatically, so you’ll have to do that yourself to see our new address. After you did it, you should see something like this:
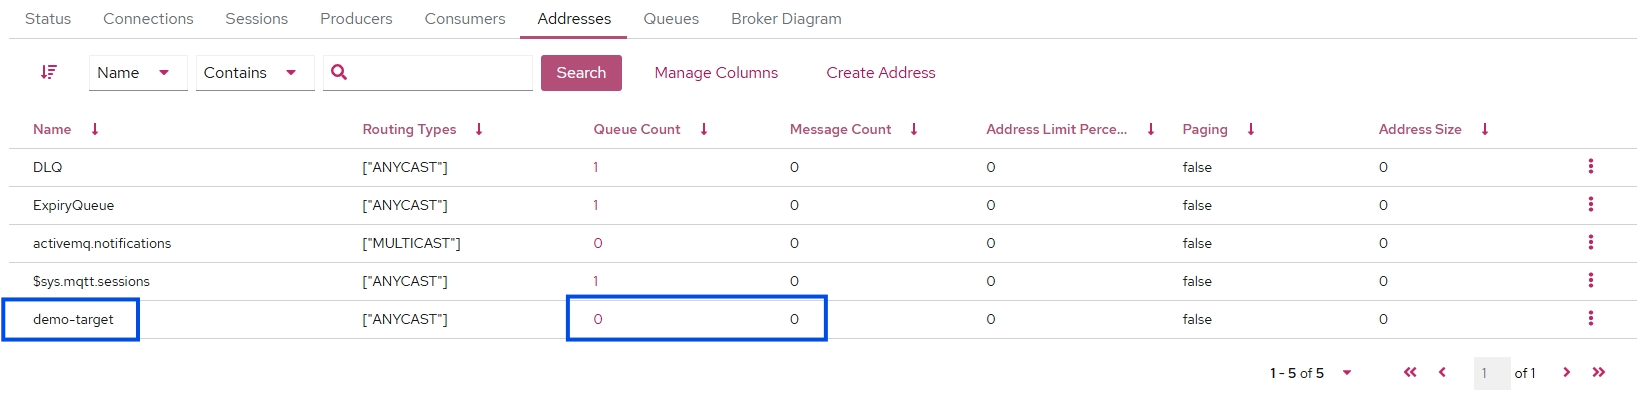
As you can see, our demo-target address has been created and the Queue Count and Message Count values are 0. If you want to manually create a queue for this address, you can do so by clicking the three dots icon at the end of the row, but we’ll let Artemis deal with that automatically for this simple demo. When we send our first message, a queue will be created for us.
A small note about Routing Type - Anycast vs Multicast
In ActiveMQ Artemis, an address is a logical destination where the messages are sent. When creating the address, you have to decide what routing type you want to use. The options are anycast and multicast.
A deep dive is out of scope here, but in short, anycast, or in other words, point-to-point, is basically a traditional queue. When a message arrives, the broker will distribute the message to a single consumer out of the available consumers. This effectively works as a load balancer.
On the other hand, multicast is a topic. When a message arrives to a multicast address, Artemis delivers that message to every single consumer. It basically follows the pub/sub model.
Sending a message
It’s time to set up our .net application to be able to send messages. First, let’s create a new file, AmqpSender.cs with the following content:
using Amqp;

namespace dotnet_amqp_messaging;
public class AmqpSender
{
    public async Task SendMessageAsync(string messageBody)
    {
        Connection? connection = null;
        try
        {
            Address address = new Address("localhost", 5672, "admin", "admin", scheme: "amqp");
            connection = await Connection.Factory.CreateAsync(address);
            var session = new Session(connection);
            var sender = new SenderLink(session, "demo-sender", "demo-target");

            var message = new Message(messageBody);
            await sender.SendAsync(message);

            Console.WriteLine("Message sent to AMQP topic");

            await sender.CloseAsync();
            await session.CloseAsync();
        }
        catch (Exception ex)
        {
            Console.WriteLine(ex.Message);
        }
        finally
        {
            if (connection != null)
            {
                await connection.CloseAsync();
            }
        }
    }
}
Make sure the using Amqp statement is present, so you can access the AMQPNetLite.Core package, that we’ve already installed.
Our method accepts a single string parameter, that will be the content of the message we want to send. We create an Address instance with the necessary information for the Artemis connection. Obviously, you should not handle your config, especially your secrets, like we do it here, but proper configuration is not our scope in this series.
Then, we use Connection.Factory.CreateAsync with our address passed to it to create our Connection instance. After that, we can create a Session instance, which our connection is supplied to. The last piece of the plumbing work is creating a SenderLink, which receives our session, a unique name for the link, and lastly, the target address.
It is very important that the target address we pass to new SenderLink() matches the name of the address we’ve created in Artemis.
With these done, all we have left to do is creating a Message instance, call SendAsync and close our connection.
This is all of the logic we need to send messages, so let’s use it. Replace the contents of Program.cs with this:
using dotnet_amqp_messaging;

var sender = new AmqpSender();
await sender.SendMessageAsync("demo message");
Now we are ready to run our application. If we’ve done everything correctly, after running our program, the output should be something like this:

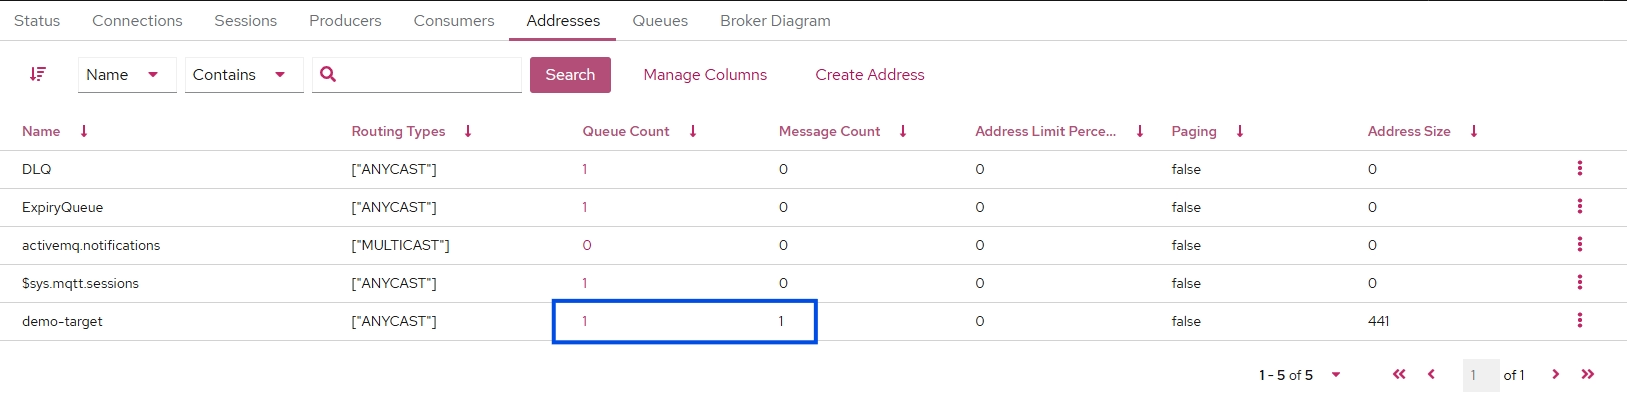
After the program has executed successfully and we check the Addresses tab, the automatic queue for our address should be created and Message Count should be 1 too.
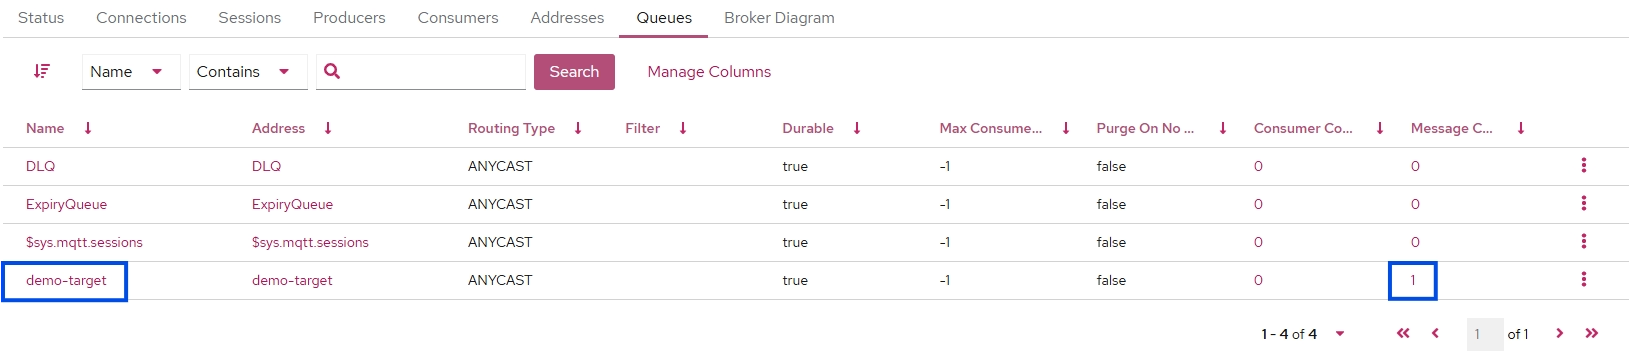
If we navigate to the Queues tab, we should see the demo-target queue with a Message Count of 1.
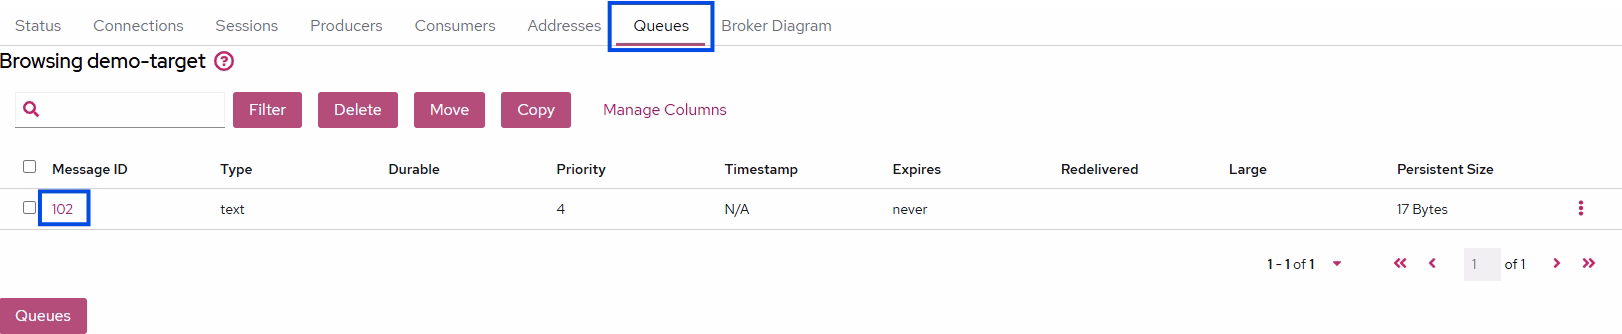
Clicking the name of the queue lets us checking what’s inside:
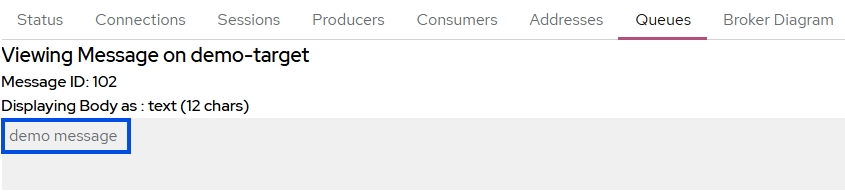
Now let’s click on the Message ID to see the message content:
And we’re done! Our AmqpSender is fully functional. Next time we’ll take a look at receiving messages sent by Artemis.
Part 3, covering actually receiving messages from Artemis is out. Take a look!
Newsletter
Sign up for my maybe monthly (not likely) newsletter for updates on new posts and other content.