
2025-10-03 @
AMQP 1.0 Messaging in .NET with Apache Artemis - Part 3
In part 1 of this series, we’ve created a dockerized Artemis instance and our starting .NET application.
In part 2, we’ve configured an Address on Artemis and created our AmqpSender.
This time, we’ll take a look at receiving messages from Artemis.
The source code for this article can be found here.
Let’s create our receiver
Our first step is creating AmqpReceiver.cs with the following content:
using Amqp;

namespace dotnet_amqp_messaging;
public class AmqpReceiver
{
    public async Task StartListeningAsync(CancellationToken cancellationToken)
    {
        var brokerUrl = "amqp://admin:admin@localhost:5672";
        var addressName = "demo-target";

        Connection? connection = null;
        try
        {
            connection = await Connection.Factory.CreateAsync(new Address(brokerUrl));
            var session = new Session(connection);
            var receiver = new ReceiverLink(session, "demo-receiver", addressName);

            Console.WriteLine($"Receiver attached to address '{addressName}'. Waiting for messages...");

            while (!cancellationToken.IsCancellationRequested)
            {
                var message = await receiver.ReceiveAsync(TimeSpan.FromSeconds(1));

                if (message != null)
                {
                    Console.WriteLine($"Received Message: '{message.Body}'");
                    receiver.Accept(message);
                }
            }

            await receiver.CloseAsync();
            await session.CloseAsync();
        }
        catch (Exception ex)
        {
            Console.WriteLine($"Error: {ex.Message}");
        }
        finally
        {
            if (connection != null && !connection.IsClosed)
            {
                await connection.CloseAsync();
                Console.WriteLine("Connection closed.");
            }
        }
    }
}
This time, we’ve opted to supply the broker’s URL as a string to our Address, but the basic concepts are the same as before, when creating AmqpSender. The only difference in the basic setup is that this time, instead of creating a SenderLink, we need to create a ReceiverLink.
Obviously, in a production app, you don’t want to hard code your URLs and credentials like this, but as I mentioned before, proper config and secret handling is not the point here.
With our connection being set up, we utilize a while loop and a CancellationToken to keep our application running. We’ve opted for a very simple console app with no other responsibilities for demo purposes, but in a prod system, you’d likely set your app up as some kind of a background service. For this brief demonstration, this is fine.
Inside the loop, we call ReceiveAsync on our receiver instance and pass TimeSpan.FromSeconds(1) to it. This is important for our setup. This way, the loop waits for a message or 1 second to pass, then it continues. We could technically pass TimeSpan.MaxValue or Timeout.InfiniteTimeSpan and make our code wait infinitely, but that would break our cancellation logic, because it could only check if the token was cancelled after a message was received.
When the cancellation arrives from outside, we just have to close our receiver, session and connection, just like we did with AmqpSender.
I want to note that this time, we’ve set up a receiver on the same Address we are sending messages to, so demo-target. This is just to make our life easier for this demo, but generally, even if you have a use case where you both send/receive messages to/from a message broker, you’d likely receive messages from a different address than the one you’re sending messages to.
Time to listen
To start our receiver, we have to change Program.cs to reflect the following:
using dotnet_amqp_messaging;

Console.WriteLine("Demo started. Press Ctrl+C to exit.");

var sender = new AmqpSender();
await sender.SendMessageAsync("demo message");

var cts = new CancellationTokenSource();

Console.CancelKeyPress += (sender, eventArgs) =>
{
    eventArgs.Cancel = true;
    cts.Cancel();
    Console.WriteLine("Shutting down...");
};

var receiver = new AmqpReceiver();
await receiver.StartListeningAsync(cts.Token);

Console.WriteLine("Application has shut down.");
We still have the message sending logic like before, but we create a CancellationTokenSource and add an event handler to the Console’s CancelKeyPress event, which calls the Cancel() method on our token source. This way, when we want to cancel, we just have to press Ctrl+C (on Windows) and our app stops gracefully, after every connection has been closed. Until we trigger CancelKeyPress, our app will keep listening to messages.
After setting this cancel functionality up, all we have to do left is instantiate an AmqpReceiver and call StartListeningAsync with the CancallationToken being passed to it.
These are all the changes we had to make to our code, so let’s test it!
Running the app
As always, make sure the Artemis container is running and the demo-target address has been set up. If you’ve done everything like I did in part 1, you just have to run docker compose up in the folder that contains our docker-compose.yml file.
With this out of the way, let’s start our application! If we haven’t done any mistakes, this should be the output:

As you can see, on startup, the demo message has been sent to Artemis, then our application subscribed to the queue and instantly received the message. If you started the app for the first time, you might’ve received multiple messages, because the queue had no consumers until now, so every message you might’ve sent while testing our program while following part 2 was sitting right there. Given, that you’ve set up Artemis with some kind of persistent storage, like the volume in our docker-compose.yml.
To further prove that we are receiving the messages, let’s go to the Artemis console at http://localhost:8161, click the Addresses tab, then the three dots icon in the row of demo-target. You should see a Send Message option, which opens a pop-up window. Keep our app running though!
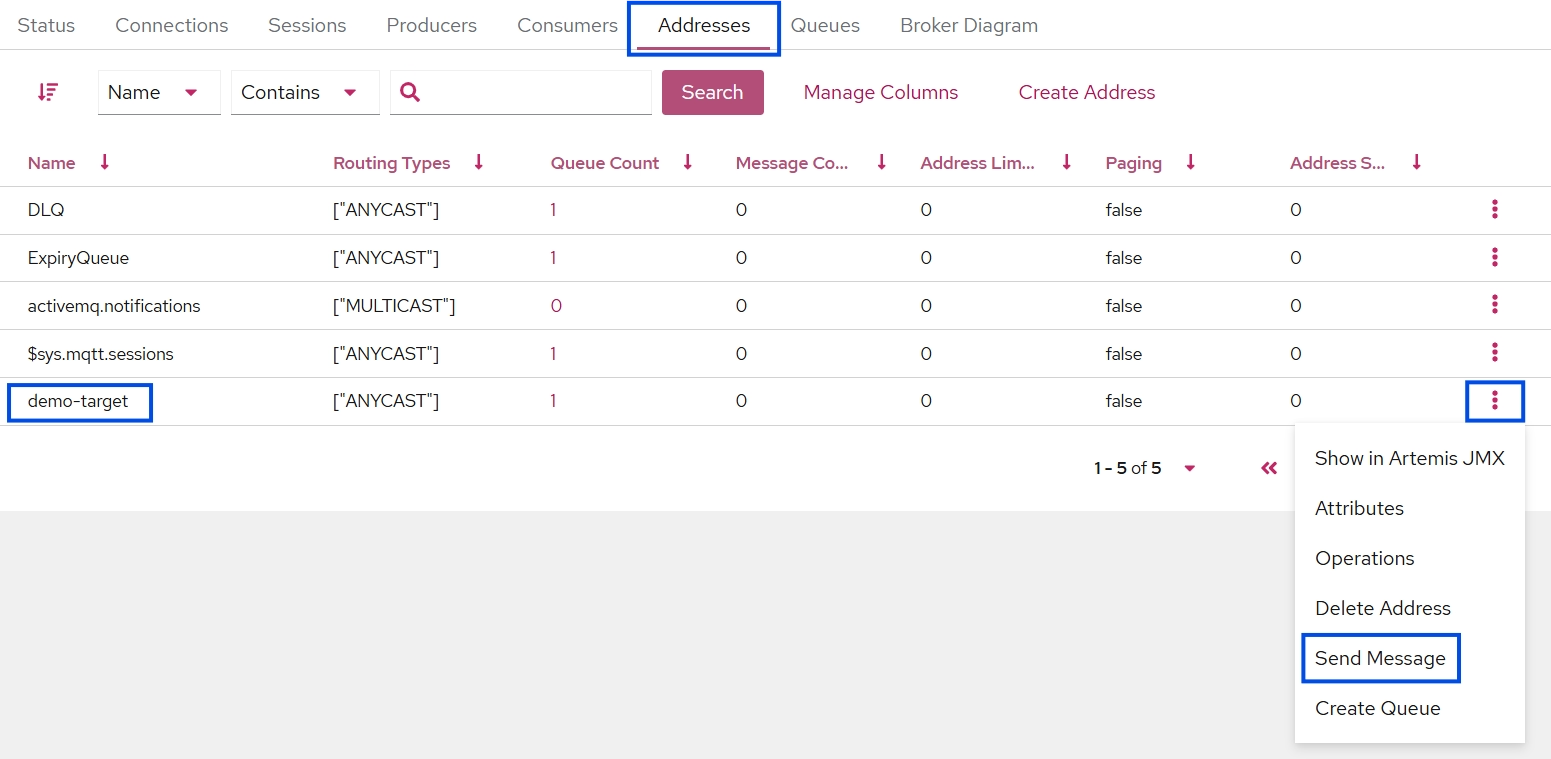
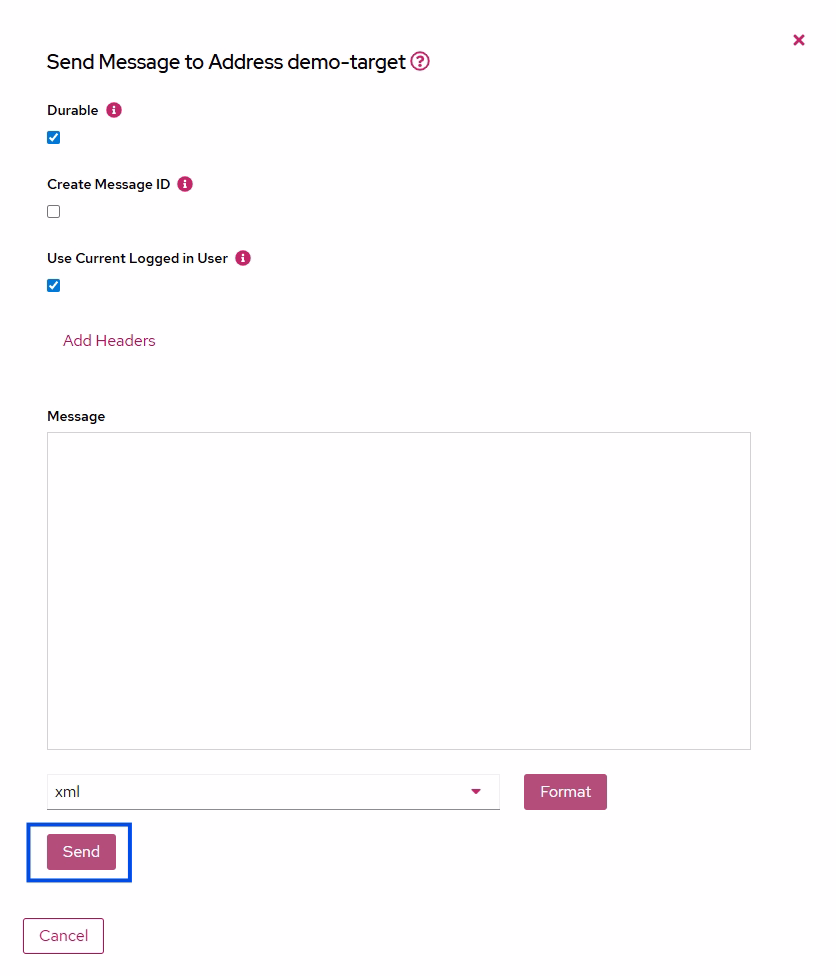
There are some options you can play around with in that window, but for sending a message with an empty string as the body, just click the Send button.
After clicking Send, you should see something like this as our app’s output:

Conclusion
With this post, this series is likely over, but as you can see, setting up AMQP in .net is really easy, both on the sending and receiving end. I hope it was helpful for someone out there!
Newsletter
Sign up for my maybe monthly (not likely) newsletter for updates on new posts and other content.