
2025-08-28 @
Angular PWA tutorial part 4 - Push notification frontend implementation
Changelog:
2025-08-30: Added link to part 5.
In the previous posts we’ve created our PWA app, we’ve notified our users about a new version being available and we’ve created a simple backend with Node.js and Express to securely handle push notifications.
This time, we will dive into the frontend part of sending push notifications, so in case you are not up to speed, make sure to go through part 1 to part 3.
As always, the complete source code will be available here.
Plumbing
Before we get into the nitty gritty, let’s take care of the plumbing. In app.config.ts, we will have to configure our app to provide HttpClient when we ask for it, so let’s add provideHttpClient to the providers array:
import { ApplicationConfig, provideBrowserGlobalErrorListeners, provideZoneChangeDetection, isDevMode } from '@angular/core';
import { provideRouter } from '@angular/router';

import { routes } from './app.routes';
import { provideServiceWorker } from '@angular/service-worker';
import { provideHttpClient } from '@angular/common/http'; // <--- ADD THIS

export const appConfig: ApplicationConfig = {
  providers: [
    provideBrowserGlobalErrorListeners(),
    provideZoneChangeDetection({ eventCoalescing: true }),
    provideRouter(routes),
    provideServiceWorker('ngsw-worker.js', {
      enabled: !isDevMode(),
      registrationStrategy: 'registerWhenStable:30000'
    }),
    provideHttpClient(), // <--- ADD THIS
  ]
};
Fun fact, starting with Angular 21, unless you need to do more configuration on the HttpClient, like setting up interceptors for example, this step becomes unnecessary, because it will be provided in root.
One more thing we will do is set up environment files to store our VAPID public key and the api URL. In older versions, these were created by default in Angular projects, but in recent versions, you have to use the Angular CLI to create them:
ng g environmentsAfter running this, the src/environments folder and the environments.ts and environments.development.ts files in it will be created. The CLI also updates angular.json and adds the following lines to the development configuration:
"fileReplacements": [
  {
    "replace": "src/environments/environment.ts",
    "with": "src/environments/environment.development.ts"
  }
]
With this setup, during development, the application will use the values from environment.development.ts, but in prod builds, it will use environment.ts. In the GitHub repo, you’ll only find an environment.example.ts file, but you should update your own environment files based on that.
Update your environment files to look like this:
export const environment = {
  apiUrl: 'YOUR_API_URL',
  vapidPublicKey: 'YOUR_VAPID_PUBLIC_KEY',
};
Replace the value of vapidPublicKey with the key we’ve generated in part 3 and the value of apiUrl with the url your backend is running at. If you’ve done everything like me, it should be http://localhost:3000.
We should note here, that during development of an Angular project, you’d most likely have to set up a proxy to avoid CORS issues. It is not in the scope of this tutorial, so for simplicity, we’ve dealt with that in part 3 on the backend.
The last bit of plumbing is creating a simple service that handles the api calls. Let’s create src/app/shared/notification/notification.ts and add the following code:
import { HttpClient } from "@angular/common/http";
import { inject, Injectable } from "@angular/core";
import { environment } from "../../../environments/environment";

@Injectable({
  providedIn: 'root'
})
export class NotificationService {
  private readonly http = inject(HttpClient);

  subscribe(sub: PushSubscription) {
    return this.http.post(`${environment.apiUrl}/subscribe`, sub);
  }

  notify() {
    return this.http.post(`${environment.apiUrl}/notify`, null);
  }
}
It’s a very simple service, but let’s go through it anyway. We inject HttpClient to be able to send HTTP requests and we create two methods.
The subscribe method receives a PushSubscription instance (more on that later) and sends it as the body of a POST request to our backend’s subscribe endpoint.
The notify method simply sends a POST request to the backend’s notify endpoint. It does not send any data, so we set the body to null. Since we do not need to send a payload, technically, we could use a GET request here, but calling this endpoint will simulate the event that triggers the sending of push notifications, so there are side effects happening on our backend. Meaning, that using GET would be bad practice.
One last thing I want to mention here, is that you should pay attention to import environment from the environment.ts file. Importing it from environment.development.ts would lead to errors down the line.
Introducing SwPush
Similarly to SwUpdate, which we discussed in part 2 of this series, the SwPush service is provided by @angular/service-worker and it enables our application to interact with the Push API. With SwPush, you can subscribe and listen to notifications. Also, it lets you manage subscriptions. We will focus on the subscribe functionality here, but I’ve linked further resources above if you want to dive deeper.
Implementing the push notification feature
With all the plumbing done, let’s turn to app.ts. First things first, let’s update our template and add two buttons. One to subscribe to notifications and one to trigger the backend to send a notification.
@if (isNewVersionReady()) {
  <span>🆕 New version available! Please reload the application.</span>
  <button (click)="reload()">Reload</button>
}
<h1>Welcome to {{ title() }}!</h1>
@if (network.isOffline()) {
  <span>🚫 Offline</span>
}

<button (click)="subscribe()">Subscribe to Notifications</button>
<button (click)="notify()">Send Notification</button>

<router-outlet />
Then, we will need to inject our NotificationService and SwPush, so add these to the declarations at the top of our class definition:
private readonly notification = inject(NotificationService);
private readonly swPush = inject(SwPush);
We are almost done with our implementation, we just have to add the handlers for our buttons:
async subscribe() {
  if (this.swPush.isEnabled) {
    const sub = await this.swPush.requestSubscription({
      serverPublicKey: environment.vapidPublicKey
    });
    this.notification.subscribe(sub).subscribe();
  }
}

notify() {
  this.notification.notify().subscribe();
}
Let’s get notify out of the way. It just simply calls our backends notify endpoint with the help of our NotificationService. It’s just a trigger to send notifications really.
The interesting part is subscribe. First, we check if service workers are enabled with this.swPush.isEnabled. Web push notifications only work, if our service worker is running, so it is important to check at the beginning.
After the check, we utilize the requestSubscription method of SwPush. We pass our VAPID public key to this method and it returns a PushSubscription. If you run this for the first time, you might be prompted for permission to receive notifications, which you need to grant for this to work. When we received our subscription instance, we pass it to our backends subscribe endpoint.
You can read more about PushSubscription here, but in short, it contains the URL of the endpoint associated with the subscription and the secrets that will be used to encrypt the push messages. On the backend, the web-push library handles all of this. For our purposes, you just need to know, that we receive this PushSubscription instance through SwPush and pass it to our backend.
With everything set up, rebuild the frontend and restart http-server:
ng buildnpx http-server -p 8080 -c-1 dist/pwa-tutorial/browserOn a new terminal window, move into the push-notification-server folder and run the backend application:
cd push-notification-servernode index.jsWith both of the applications running, after you were notified about a new version being available and refreshing the PWA, you should see this:

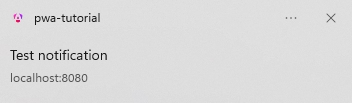
Make sure to click on the “Subscribe to Notifications” button, then click the “Send Notification” button. If everything went well, you should see a notification native to your operating system. This is how a notifications looks like on Windows:
Newsletter
Sign up for my maybe monthly (not likely) newsletter for updates on new posts and other content.