2025-08-30 @
Angular PWA tutorial part 5 - Controlling appearance and installability
Changelog:
2025-09-01: Added link to part 6.
2025-09-20: Fixed icons in manifest.
In the first post of this series, we’ve created and installed our PWA app. In the second, we’ve notified our users about a new version being available. In part 3 and 4 we implemented the backend and frontend for the web push notification feature.
In this edition, we will take a look at how we can take a bit more control about the appearance and installability of our application with the help of the manifest.webmanifest file.
As always, the complete source code will be available here.
High level view of the manifest
When you manually create a PWA, this file will be in the center of your attention much earlier, as it is not an Angular specific concept, but as we discussed it in part 1 of this series, the @angular/pwa schematic of the Angular CLI took care of the basic setup for us. It created the manifest.webmanifest file in the public folder of our application, so it gets copied into the built application, next to index.html.
Also, it added a link tag to the head of the index.html file, like this:
<link rel="manifest" href="manifest.webmanifest">The presence of a link tag with rel="manifest" set and that is what triggers the browser to prompt the user to install the application to their home screen. We can have some control over the installation process through the linked manifest file, which holds a simple JSON object.
You can read about all the members and the possible values you can set in the manifest file here, but we will take a look at some of them together.
Explaining the manifest in it’s current state
So right now, our manifest.webmanifest file looks like this:
{
  "name": "pwa-tutorial",
  "short_name": "pwa-tutorial",
  "display": "standalone",
  "scope": "./",
  "start_url": "./",
  "icons": [
    {
      "src": "icons/icon-72x72.png",
      "sizes": "72x72",
      "type": "image/png",
      "purpose": "maskable any"
    },
    // ...
    {
      "src": "icons/icon-512x512.png",
      "sizes": "512x512",
      "type": "image/png",
      "purpose": "maskable any"
    }
  ]
}
The name and short_name members specify the name for your app that will be shown to the users in places like the label for the icon on the home screen or the task manager. By default, name will be used, but if defined, short_name may take precedent when limited spaces is available. By default, the Angular CLI has set up the project name for both of these members.
With the display member, you can control if you want to show some parts of the browser UI to the user or make your app look like a native app. By default, this is set to standalone, so we don’t show any browser UI at all, but you can set it to browser if you want to show the entire browser UI or minimal-ui if you want to show a limited set of browser controls.
The scope sets the top-level URL path that contains your PWA. If the user navigates to a URL that is out of the defined scope, the browser will show its own controls, notifying the user that they navigated out of the scope of your application.
That brings us to start_url, which is fairly self-explanatory. This is the URL that will load when the user starts the already installed PWA from their home screen.
Finally, let’s look at the icons member. The configuration here tells the browser what icons can it use and the context the icons can be used in. The minimum required setup for icons is the following:
"icons": [
  {
    "src": "icons/icon-72x72.png"
  }
]
However, the Angular CLI has set us up with a lot more than that, so let’s take a look at it.
Icons
So the icons member contains an array and you can add several icons with their own configuration.
An icon object has four properties:
src: the path to the icon file.sizes: a space separated list of (width in pixels)x(height in pixels) format, which specifies at what sizes the icon should be used. If omitted or no size fits what the browser wants, the selection of the used icon will vary depending on the specific browser’s implementation.type: a string specifying the MIME type of the image. If omitted, browsers infer the type, but specifying it can lead to performance improvements, because the browser can automatically ignore unsupported formats instead of trying to use its resources to infer the MIME type.purpose: this is also a space separated list of strings that specify in what context the icon can be used. Valid values aremonochrome,maskableandanywithanybeing the default value.
The Angular CLI added the Angular icon in 8 different sizes to the icons member, with all of the mentioned properties specified, and it added the icon files to public/icons. The only part that is not necessarily self explanatory is the maskable value set to purpose. It means that the icon was designed with icon masks and safe zone in mind, which is mostly a concern when it comes to Android’s adaptive icons feature. Basically, this tells the browser that the essential part of the logo is contained within a circular area at the center of the image, so the non-essential parts, like the edges, can be trimmed.
Maskable is a handy tool to visualize and play around with the concept.
Some other interesting manifest members
This is a non-exhaustive list of possible manifest members that I think you might want to take a look at:
theme_color: allows you to specify the default color of the web app’s user interface.description,categories,screenshots: these allow you to control the info shown about your app in app stores if you end up releasing it.orientation: enables you to control the default orientation with values likelandscapeandportrait. This is obviously most relevant on mobile devices.
And there are much more that you can dive deep into here.
Let’s modify our own manifest!
First of all, let’s take a look at our current state. Our current icon for our application looks like this:

And here’s our application in its current state:
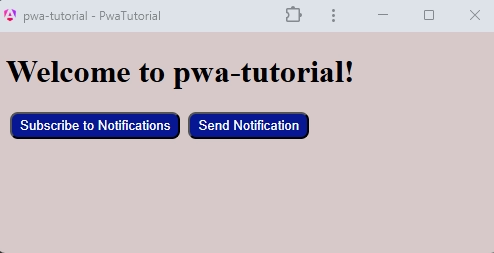
Now let’s change some stuff! I’ve renamed the application, changed the display member to minimal-ui, added the color of our buttons to the theme_color member, and replaced the Angular icon with my own:
{
  "name": "my-awesome-pwa",
  "short_name": "my-awesome-pwa",
  "display": "minimal-ui",
  "theme_color": "#071793",
  "scope": "./",
  "start_url": "./",
  "icons": [
    {
      "src": "icons/nb-logo-original.png",
      "type": "image/png",
      "sizes": "144x144"
    }
  ]
}
Changes in the manifest do not take effect immediately. Browsers check periodically, if changes were made and apply them eventually, but if you want to instantly see our changes, you have to reinstall our application. First, you will have to remove our current installation. You can do that by starting our app and clicking on the 3 dots icon in the toolbar, then select the “uninstall pwa-tutorial” option. This is how you do it on Windows with Chrome, but it might differ based on browser and operating system. It should be very similar and straight-forward though.
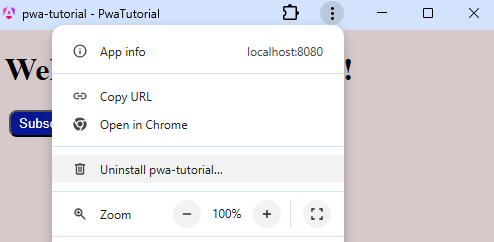
Secondly, let’s rebuild and run it with http-server as usual:
ng buildnpx http-server -p 8080 -c-1 dist/pwa-tutorial/browserIf our new app is running, navigate to https://localhost:8080 in your browser. Now, since we just removed our application, the browser might not prompt you immediately to install it again, since it assumes you removed it for a good reason. Don’t worry, it will prompt again, if it determines the user actually want to use it, because it visits it repeatedly and interacts with the app. Either way, you will have to install the app through the browsers menu. Here’s how in Chrome:
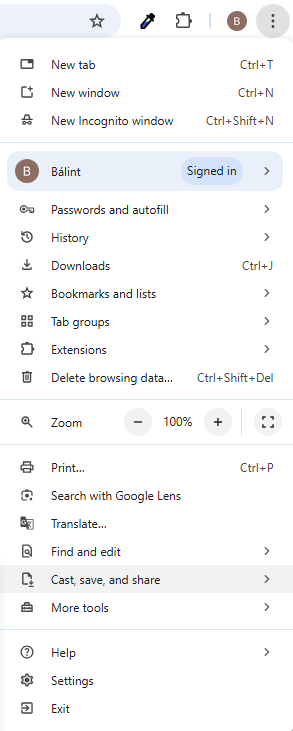
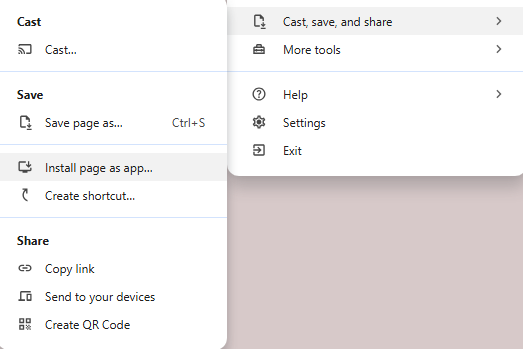
After you’re done, our new icon with the new name should show up on the home screen:

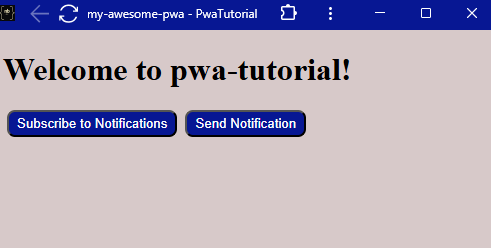
When it opens, you should see our app with some browser controls, our new icon and our new name in the toolbar, with the toolbar’s color being set to the same blue our buttons are: